Source your Data Product from an Endpoint
To get started, it is easiest to source a static data product from your desktop. We’ve even provided a link to some sample data at the bottom of this page for you to practice with.
Data products sourced from an endpoint can either be static or updating and can consist of one or many files. Static data products use data which is loaded once and does not change and can be sourced from either a desktop endpoint or a cloud endpoint.
Updating or repeating data products can use data which may be regularly updated. If you are not sure if your data is going to be updated, and your data is sourced from a cloud endpoint then it is recommended to always select an update frequency and update action, even if the product does not update.
Note: You must have a Technician role and a Product Manager role to perform this act
Click on the Products icon on the navigation bar.
Click on Create Product.
Click on Original data product to begin to publish a static or updating data product created from an endpoint.
Set up your Data Product
Proceed to the Publish: Setup step of the workflow:
Set publish parameters:
Enter the working Title for the data product. This can be changed when when the data is finally packaged as a data product.
Select the Frequency - Static or any other update frequency. The update Frequency is displayed on the data product page as part of the Metadata Metrics to give more information about your data product to other users. Follow the article 'Update your Data Product from an Endpoint' to understand how to trigger the updates.
Enter the First Update date, time, and timezone to specify when the process should start to look for TNF files. If a TNF file is not found the process will just keep looking so the Frequency above is not relevant to the actual update frequency.
Select the Update action - append or replace. All updates of tabular data products must adhere to the original schema definition. If the schema has changed then a new data product must be published.
Add users to your Publish Team. You must have one or more users with the Technician role and the Product Owner role to be able to proceed. The 2 blue ticks show success.

Click Save and Continue.
Define the Source of your Data
Select Endpoint or Upload.
If using an endpoint:
Select Type.
Select Endpoint.
Your cloud endpoints must already be created.
If using an upload:
Click Browse (one table only)
OrDrag and drop your file from your desktop onto the browse button.
Copy your Data onto the Platform
Get your data ready:
If you have chosen a cloud endpoint as your Source then you must now transfer the data you want to publish to the specified folder structure on your endpoint. You must place each table in a separate folder for example :

Go to your cloud account.
Create the specific folder structure.
Move your data into the folder structure.
Return to the Review page of the publish process.
Select Refresh.
If you have chosen your Desktop as your Source then the data has already been prepared as it can only be one file.
If your source data files are listed as expected then click Save and Continue, if not then check for errors in your input file. The publish process will not complete successfully if this step is not correct.

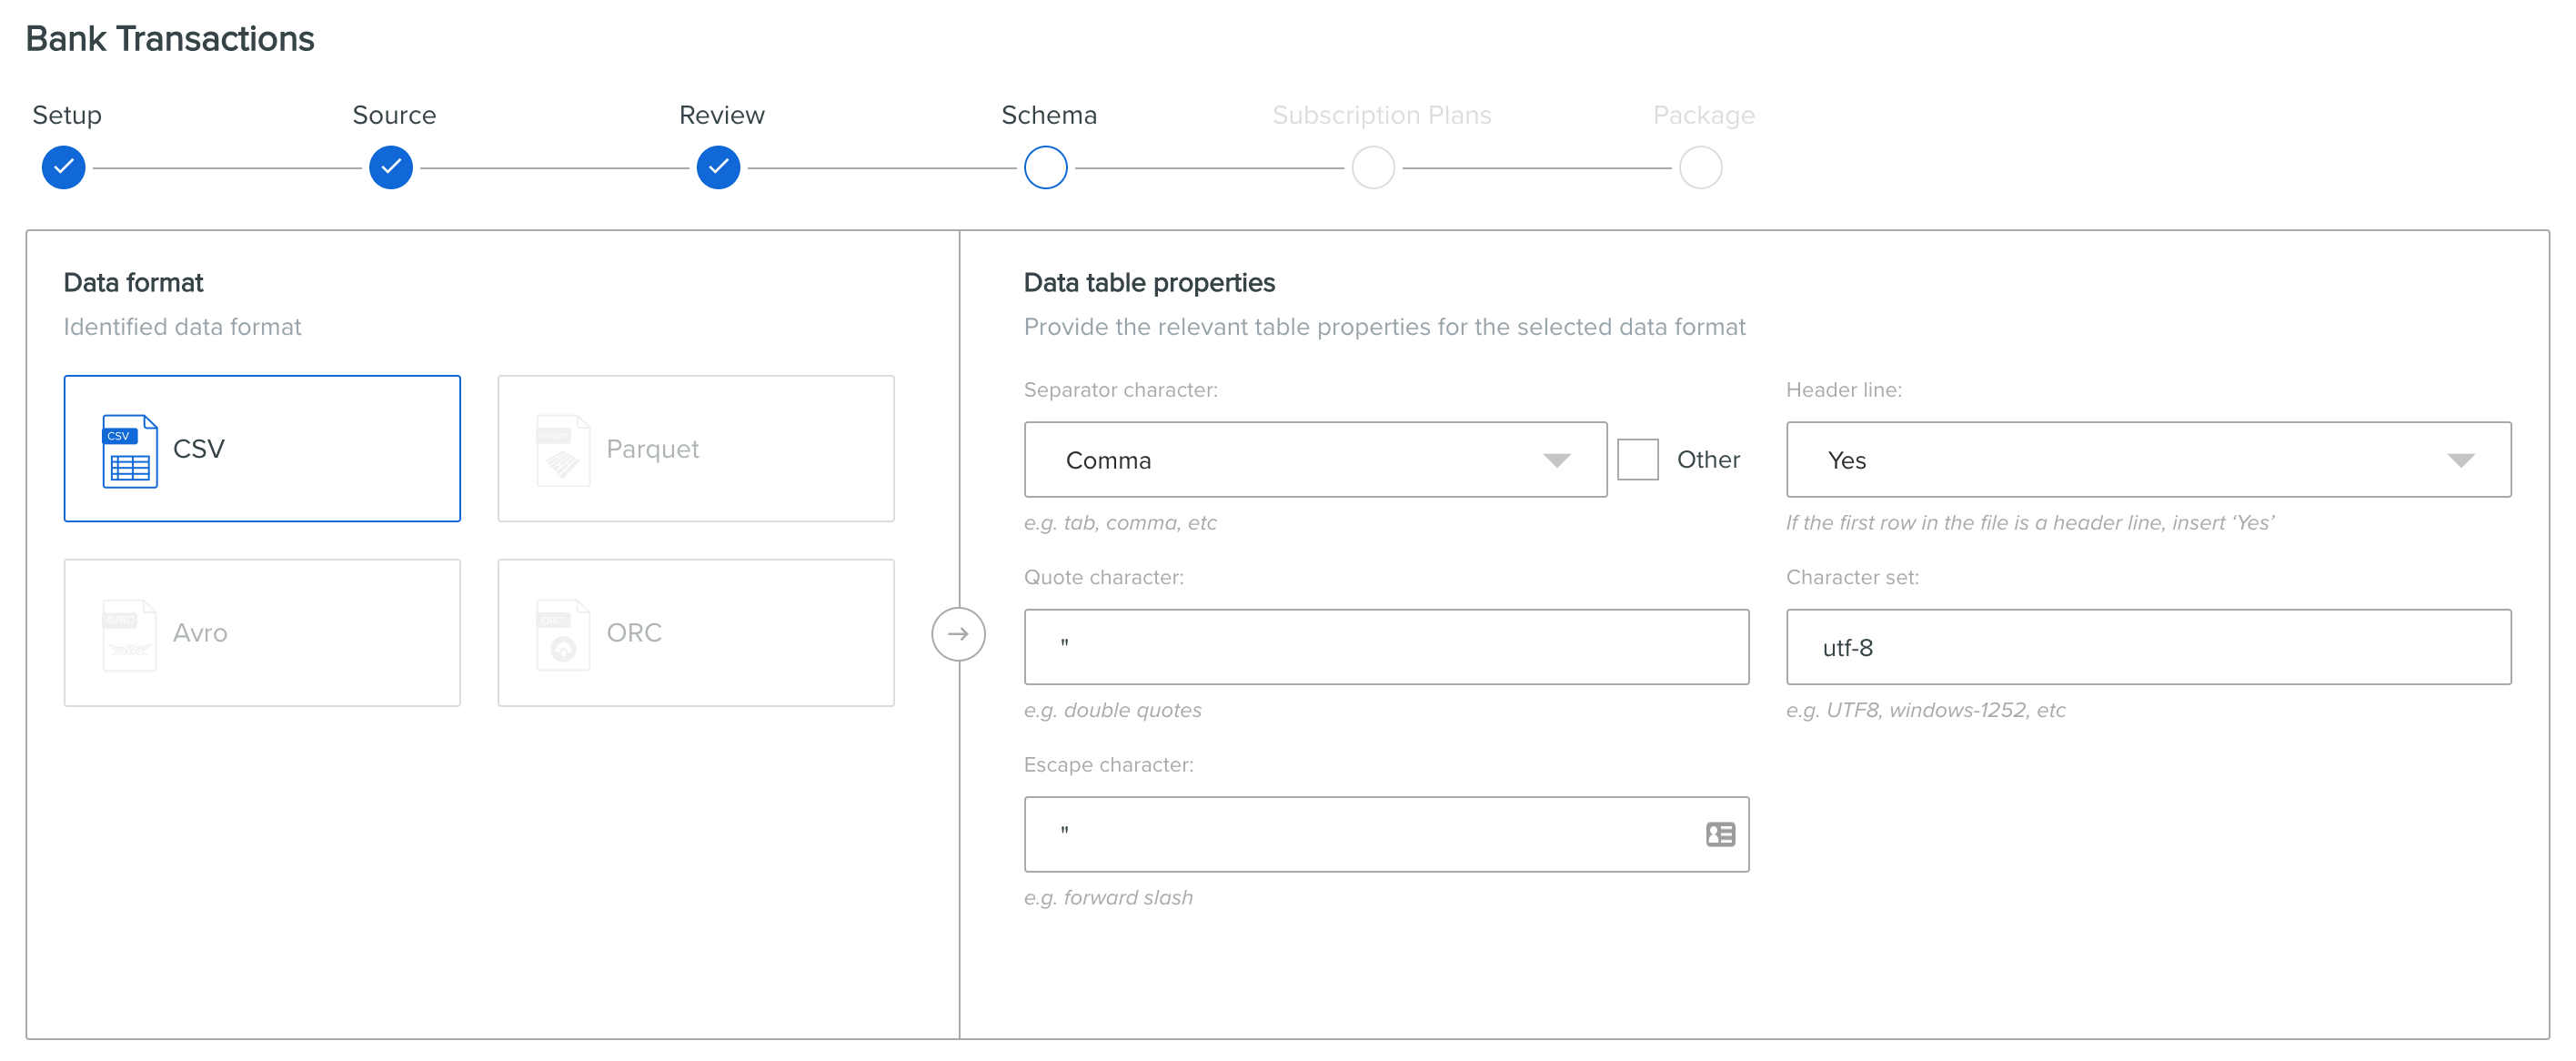
A popup asks you to confirm the format of the data:
For Tabular file formats the data discovery process is initiated to determine the structure of your data. The process can take several minutes to complete, regardless of the size of the data.
For Non-Tabular a Data Copy process begins which moves the data into a specific location created on the platform for the data product being created.
Click Continue when this process has completed successfully.
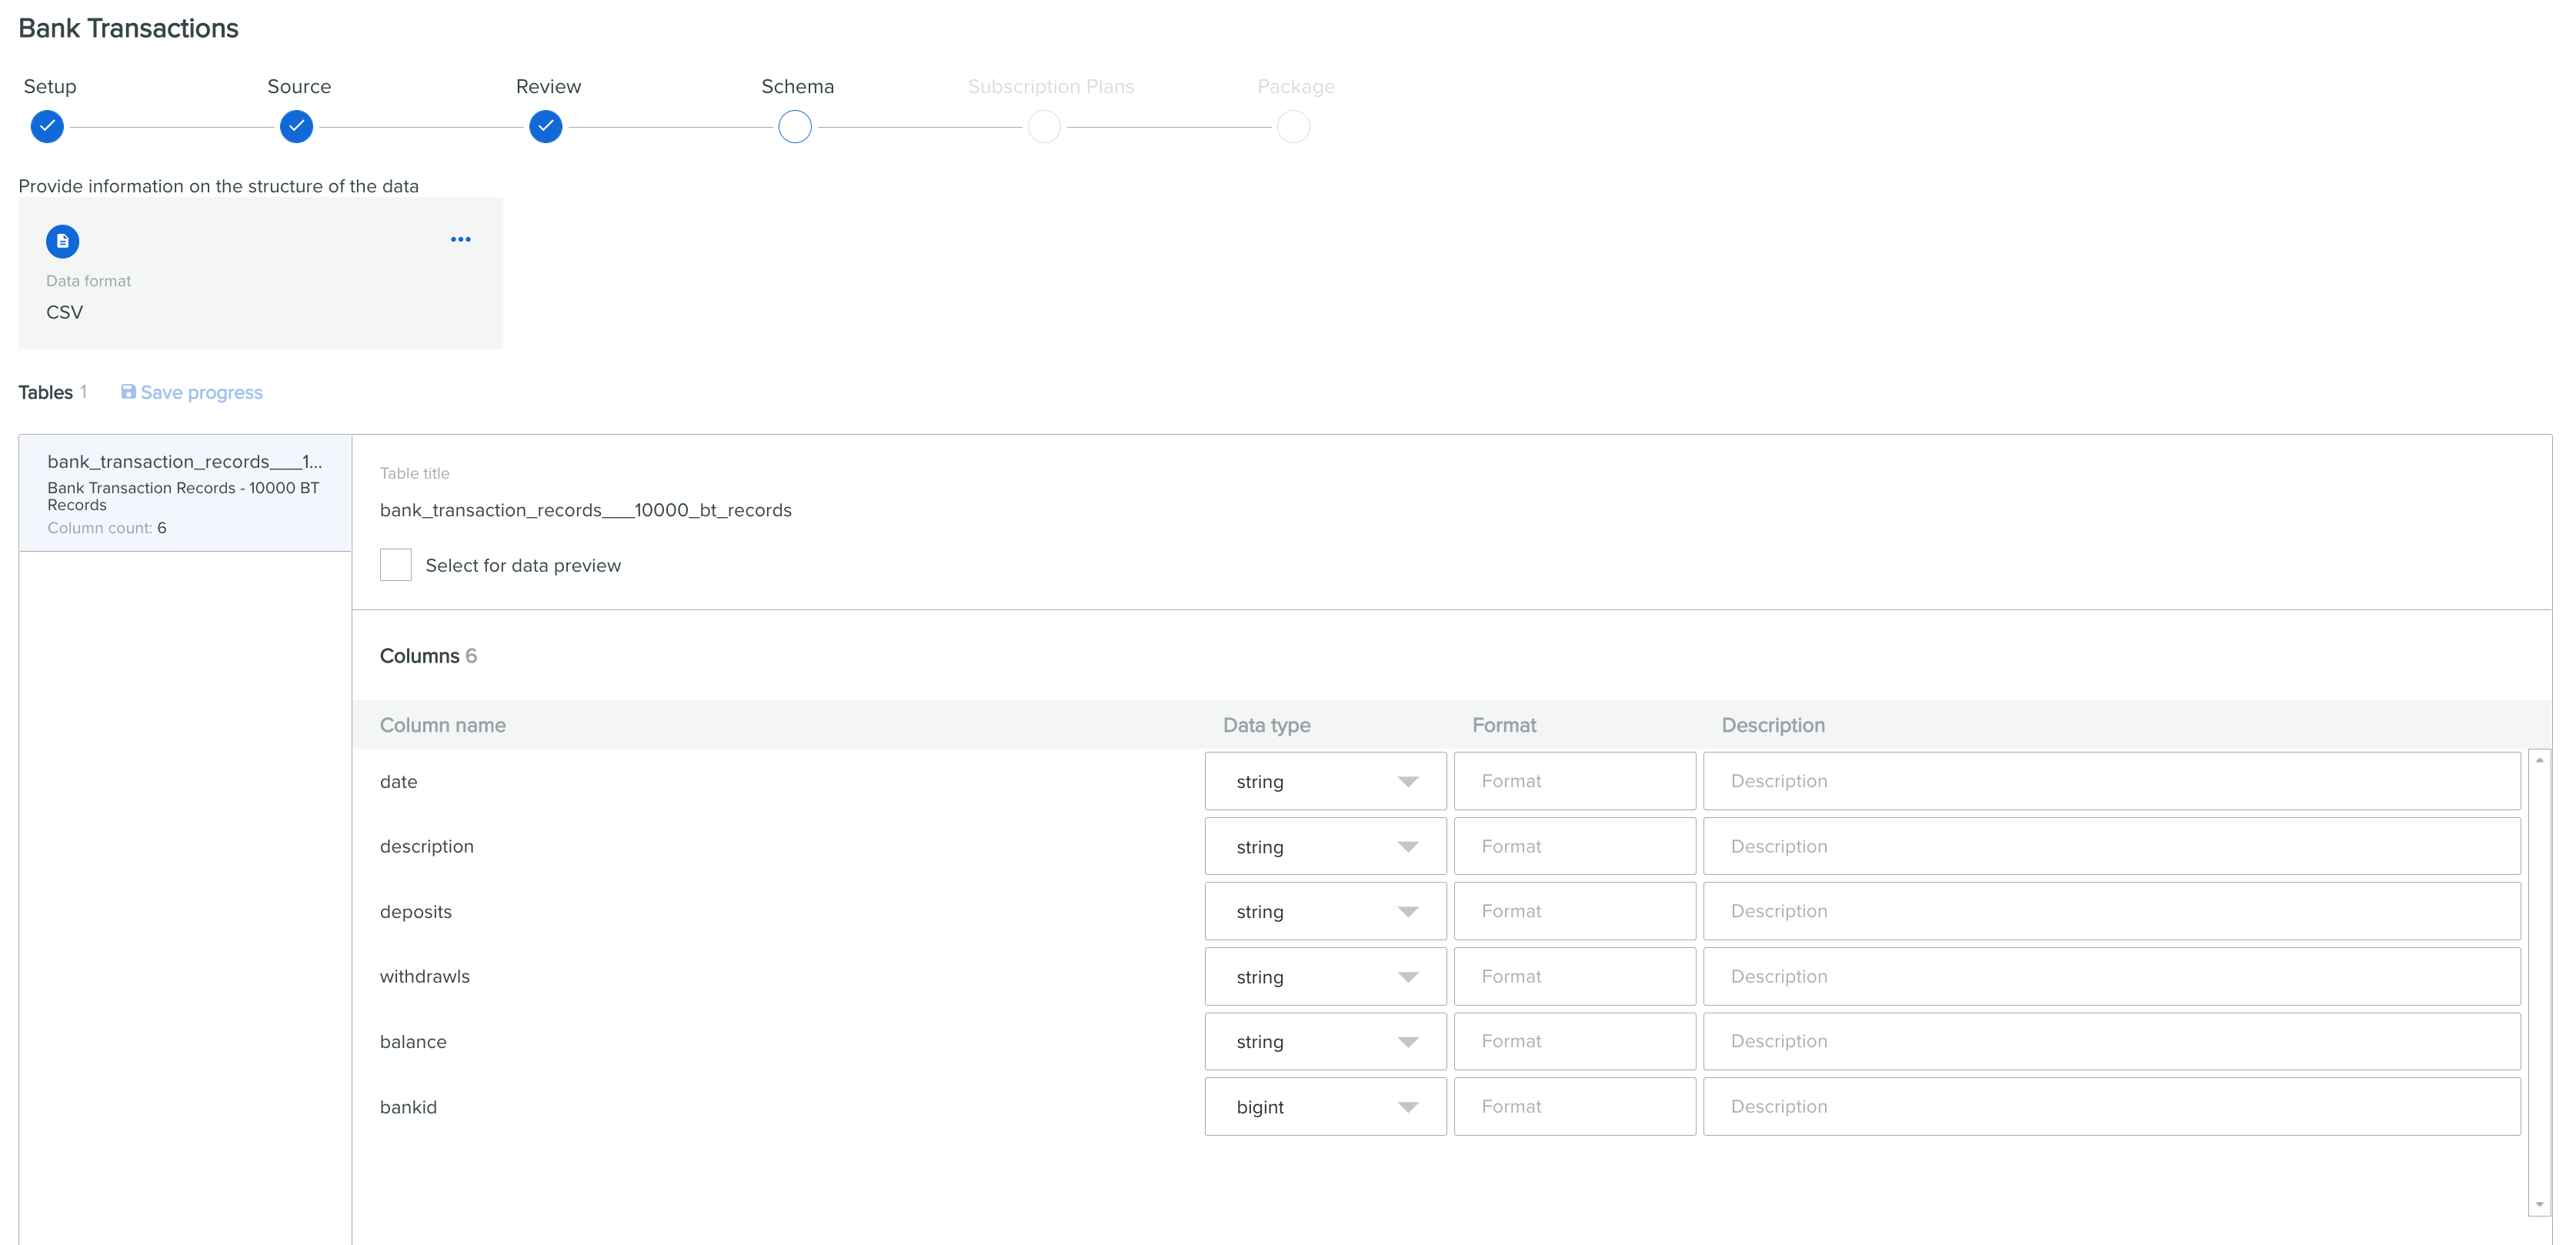
Confirm the Schema of your Data
If your data is Tabular then the next step of the publish process is to confirm the format of the data that has been detected and to select tables for preview. If your data is not tabular then this step is not required.

Review that the schema identified in the previous step is correct. Click on Save and Continue.

Make sure your data adheres to these requirements to ensure your publish is successful:
Always ensure the date column uses the Hive standard date format:
mm-dd-yyyyor accept the data column as a string and amend it in Spaces.Field names for Parquet and Orc input formats cannot contain the characters
,;{}()\n\t=as this causes a failure in Publish. The characters must be cleansed from the data ahead of the publish workflow.Special characters in field names are replaced with the
"_"character for database compliance in Spaces and Export.If your table does not show headers then check your column data types differ from the column header, i.e. a string header and a
<i>bigint</i>data type.Make sure all attribute names are in lowercase as uppercase letters can result in publish failure.
Do not include hyphens in a table name if the table is due to be updated.
For each table identified select for preview if you want a random selection of rows to be shown as a Data Preview on the data product page. You can choose a maximum of 15 tables to be show in a preview.
Select Save and Continue to proceed.
The validation process processes all records within the data file(s).
If any tables have been selected to show a preview, the sample data is displayed as further confirmation that the data has been processed correctly.
You are now ready to add subscription plan templates to your Data Product or update your data product from an endpoint on a repeating basis
References and FAQs
Transfer Notification File (TNF)
Sample Data for your First Data Product
Related Pages